Showing posts with label Birthday. Show all posts

Friday, July 31, 2015

One Great Year!

"MUMMY!! IT'S OVER~~~" Have you heard of this phrase? If you have, YES... it's been One great fulfilling year on Gerda Steiner Design Team and the owner has given me countless opportunities to share my creations and it's also a privilege to work with the rest of the members on this team! Made many new friends, know many new people in this industry and pushed my limits! My Design Team time is up now. Before i go, let me share one last card on this blog with you!

 photo _MG_9011.jpg


I am still very crazy over "How Are Ewe" clear stamp set. For this card, i stamped the sheep, ducks, party hat and butterfly from the stamp set. Coloured them with copies and used a circle die cut to cut a circle frame. Used my ink dauber with Squeezed Lemonade and Dried Marigold distress ink to sponge the top. This is an easier way than blending in circles because i am too lazy to find a waste paper to lay on my table before inking.

I used my Hero Arts Woodgrain rubber stamp and versamark to stamp on Black cardstock. Next, i dust Clear Perfect Pearls onto the black cardstock. I used clear water to spritz from a far a few times to make the perfect pearls stick onto the versa mark impression. This way, the perfect pearl shimmer will not go anywhere! "Birthday" sentiment is a die cut by Avery Elle and i filled in the word "Happy" using my white Signo Gel Pen.


 photo _MG_9012.jpg

Here's a closer look! Look at the shimmer on the woodgrain! And how the sheep can look so cute in dark pink!

I hope to see you somewhere else soon and do follow me on instagram or Facebook to see other creations i make using GSD stamps in future!

Monday, March 9, 2015

Turtley Great

 photo _MG_8899.jpg
Hi there! Thanks for dropping by today again to read my cardmaking process! I bet you have seen soooo many different amazing cards created with the "Late by with Love" clear stamp set but here i am today to share a different kind of card - called the Box Card! You can flatten this and mail it out without any issue!
I used the turtle, balloon, cupcake, candle, party hat and "Hope your day is turtley great" sentiment from the stamp set. The rest of the elements (e.g. cloud, birthday sentiment, background flowers etc) are from other brand's stamp and die set. The GSD clear stamp images are really easy to fussy cut out. If you are not a good cutter and tend to leave tiny white borders around it...... this is a solution: Grab a Momento black marker and use the brush tip to trace around the edges. Hold the cut image up and glide the brush tip around the sides.

The turtle and cupcakes were colored with Prisma ColorPencils and the balloon using Copic Markers. The only way i can color a Balloon nicely is to use Copic Markers, that's why i switched my coloring medium! I am not too sure if you have the same problem as me, but i can't use my Prisma Color and Watercolor to color faces and balloons. I can never get the correct shading/tone for it! Any tips for me girls?

 photo _MG_8900.jpg
Here is the side view of the box card. 3 layers inside. When you make a box card, make sure the images used are of different sizes and try to make some images (e.g. balloon, birds, clouds etc) to "float" at the top. This will create layer effects and bring your eyes around the top to bottom of the box card.

Till then, i will see you again in 2 weeks to share a new card with you!

Monday, February 23, 2015

Layering Cupcakes

http://gerdasteinerdesigns.com/new-products-2/late-but-with-love
Hi everyone! i am back with a new stamp set by Gerda Steiner Designs! This time round, she has released a clear stamp set. YIPPEE! It is an amazing quality and from what i feel, it is the same quality as Lawn Fawn or Mama Elephant stamp sets. You know, there are some brands out there that doesn't make comparable clear stamp sets and the ink just beads up on the lines. Never like those stamp sets - boohoo.

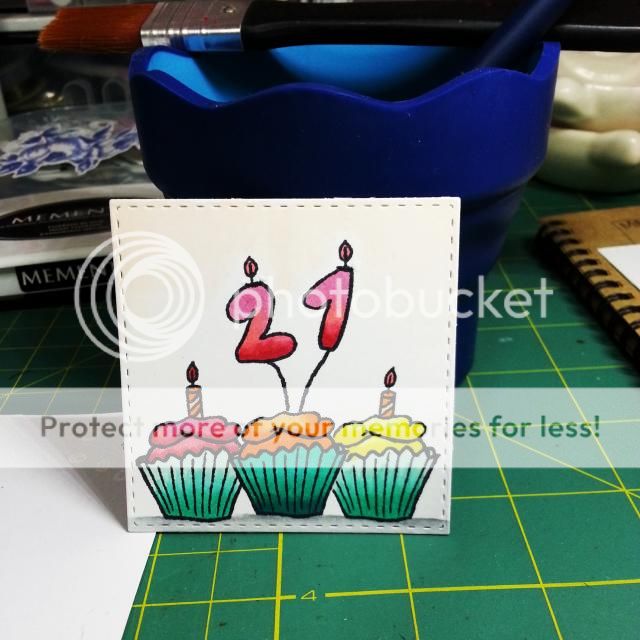
So for my first card with this stamp set, i decided to make use of the cupcakes and numbers in the set.

 photo IMG_20150221_151401.jpg
First, i die cut a stitched square with a piece of smooth white cardstock 240gsm. I then stamped a cupcake in the circle bottom.

 photo IMG_20150221_151327.jpg
Next, i stamp another cupcake on a piece of masking paper. If you do not have a masking paper, you can stamp on the edge of the post-it where the sticky adhesive is at the back of it and it can be a substitute of a masking paper. For me, i choose masking paper because i can re-use it many times! Next, i fussy cut it out and stick it over my cupcake on the square die cut.

 photo IMG_20150221_151242.jpg
By masking it, i can stamp another 2 cupcakes on the left and right side of it to make it 3 cupcakes in total. Odd number are a beauty, so if you notice, i like to stamp things in 3,5,7s...

 photo IMG_20150221_151159.jpg
With the masking sheet on, i stamped the balloon strings as the candle sticks for the number balloons. i had to leave the masking sheet on because the string needs to look like it it stuck inside/behind the cupcake. I then peeled the masking sheet off and stick it on the left and right cupcake before stamping the candles. Same logic, i wanted the candles to look like it is inside the cupcake.

The stamp set also has small elements to make use of. If you don't know, the bottom left corner has a small "leaf" looking thing, it is actually the candle wick! So i place it on the number balloons so it looks like solid number candles instead!

 photo IMG_20150221_151112.jpg
Peel off the mask and coloured it with copic markers!

 photo _MG_8853.jpg
Lastly, i assembled the card and left the left side blank because i want to save it to put a person's name on it! This makes the card more personalised. With cupcakes, i can't miss out to put doily on it!

Saturday, November 15, 2014

Growing up is optional

Hi everyone! Hope you haven't missed me too much as i missed last week's upload when i went on a holiday to Bangkok! It was an amazing trip apart from getting sick when i got back and my boyfriend got food poisoning. Haha... we ate the exact same things except........ i don't like fruits so i didn't get tempted to eat his sweet (yet contaminated) honeydew. That's why he got food poisoning while i had sore throat and flu. If you people haven't been to Bangkok, it's all about shopping and eating there! Thai food there are so much nicer than the ones sold in Singapore. Not forgetting, it is really cheap to shop and eat in Bangkok. I bought kind of my 1 year supply of clothes (LOL!) and i can't wait to fashion parade in them. :p

 photo IMG_20141031_190824.jpg
So anyway, here's the card this week! Very fun and bright color for someone's birthday! I used Bo Bunny's Alora Collection paper pad for the entire card. Bo Bunny always has nice pattern papers but they are always so busy and (to me) kinda hard to coordinate and layer. I had to use an edge punch to make the layers look separated or it will blend together. Colored my favourite Mimi from Penny Black using Prismacolor Pencils. Sentiment from Amy R Birthday Sentiment rubber stamp set - which is so true! Be young at heart everyone!

Till then, see you next week!

Friday, October 10, 2014

Fashionably Late

 photo IMG_20141009_194117.jpg
The other day, i forgot about my friend's birthday and i had wanted to send her a card because she sent me one during my birthday. I purposely didn't wish her "happy birthday" on facebook or through messages because i wanted to make it seem like i had forgotten! haha.. Iyah, at least the card will arrive with more surprise element!

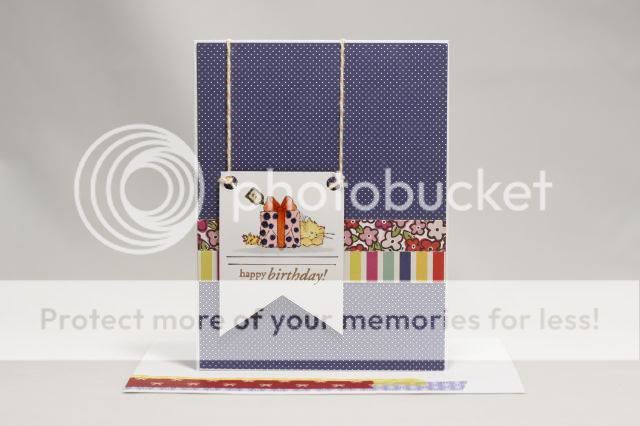
I picked a very cute sentiment from Amy R's birthday greetings stamp set to match with Gerda Steiner's Turtle digital stamp. Because turtles are slow moving that's why i choose this. If i had a snail stamp, i would use it too. Because SNAIL-MAIL!


For this card, i mixed 2 digital set from Gerda Steiner. "Take off Turtle with Birdie" and "Kitten in giftbag", using word document, i resize and crop them so as to fit the present onto the turtle.

 photo IMG_20141009_193807.jpg
So i enlarged the digital stamp set to be rather big, about 4" wide and printed it out.Colored it using copic markers and fussy cut it out. When I cut, I ignored the strings above and below the turtle. I will later on cover the string markings with twines.

 photo IMG_20141009_194237.jpg
I wrapped 3 rounds of twines around the turtle and using foam squares, i attached the turtle first.
Then using Paper Smooches Balloons die-cut i cut 2 balloons with white paper and copic colored it and 1 heart shape balloon with a piece of maroon colored felt.
I lay all the strings from the balloons down to the top of the turtle and used tape to adhere them (messily). Haha... yes, it was quite messy but thankfully the present is rather big, so i manage to hide the messy ends of twines behind the present.
If you notice the shimmer on the yellow ribbon... it is thanks to Clear Wink-A-Stella. :)


Saturday, September 20, 2014

Bright Fun Colors

 photo IMG_20140823_233011.jpg

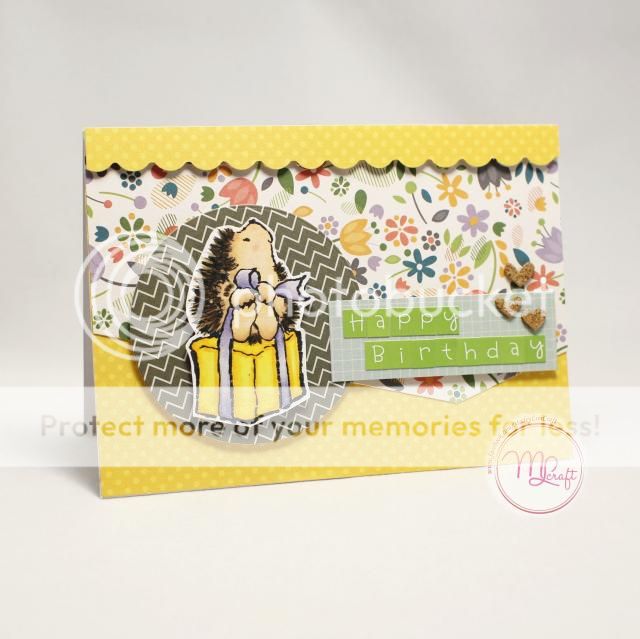
I've got a colleague who loves the Hedgehog from Penny Black and thankfully, i love them too! So whenever she orders a card from me, i have a different hedgehog to present!

Whenever i do up a card, i will look through my 6x6 paper pads and see which are the once i haven't used for a long time. The papers used here are from Lawn Fawn's first paper pad - Bright Side Collection, and their designs don't get out of style! The bright colors are so pretty and i coordinated the colors of the present that the hedgehog was sitting on.

Till then, keep creating and follow me on instagram to get insta updates!

Friday, September 12, 2014

Fly Turtle Fly

 photo IMG_20140908_215201.jpg
Hi! I am back again with another card from Gerda Steiner Designs! I am soooo spoilt by her because she sends me all these cute images and my thoughts run wild! haha.. I usually print my images in 2 sizes and then decide what i will be doing with it. So after a few days of staring at it, i decided to make the turtle fly! haha.. yes, the balloons shall bring the turtle up like the movie "UP!"

Colored the image with copics and fussy cut it out. Used 3 strings of maya road twines to attach behind the balloons and going over the turtle and attaching behind the turtle. Cut another piece of twine to tie a bow across the 3 strings. Remember to tilt the turtle so it looks like the balloons are lifting it up!

You can find the link to download the image HERE. Oh! The shop has SO MANY MORE new images this month! Go check it out and i hope you find something you like in there! :)

Monday, September 1, 2014

Delicious Cupcake

 photo IMG_20140831_235419.jpg
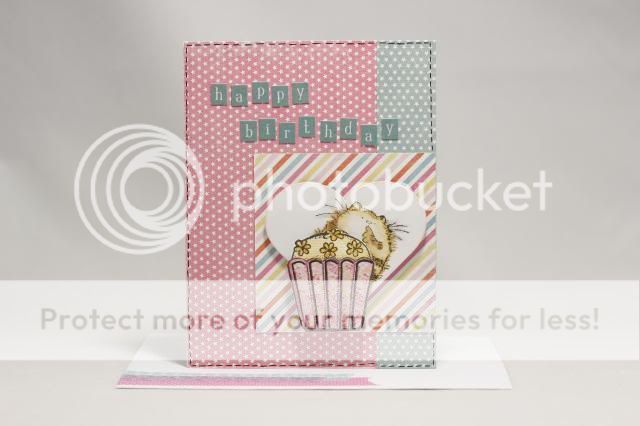
Afternoon everyone! Hope you are doing well on your Monday! Today i am here to share a birthday card using Gerda Steiner Digital Stamp. She has a series of mouse drawn and this mouse is the skinnier one. haha! i think it needs more cupcakes! I choose Amy R's birthday sentiments to go with this card because it has the words "layers" and "frosting"! Great match!

 photo IMG_20140831_235654.jpg
Colored the image with copic markers and spammed Ranger stickles on the cupcake! It's a birthday cake, it deserves some sparkles! Even though this stamp is called "Extra Sweet Birthday Cupcake", i wanted to make it even sweeter! This picture doesn't do justice to what i have done. But you may try what i had used to create the above effect.

I used Marvy LIQUID APPLIQUE YELLOW and Marvy LIQUID APPLIQUE WHITE to create the puffiness on the cupcake with my heat gun. Then i added Ranger Diamond Stickles over it. Looks like some lemon vanilla cupcake, yea?

Hope you will try something like this and share with me your blog!

Wednesday, August 27, 2014

Happy Birthday Virgos!

Hi everyone! It has been a productive week in my craft room! So much so that i had extra time to make a card for a challenge! Yes, as per the picture above, it's the Mama Elephant And Me August Challenge and i will be using the following card to enter it!

Since i was already in a watercoloring spirit when i made a card i posted a few days ago, i took the chance to make an additional watercolor background for the challenge card. And like i had mentioned earlier, i learnt my technique from a youtube video called "Bokeh Made Easy by Wplus9 Design". Instead of using watercolor palette, i used my Derwent Inktense Pencils which can be used for watercoloring too! So i used Teal Green, Apple Green and Sun Yellow for my background! I diecut a few circles onto a acetate sheet to create a DIY stencil for my Bokeh effect. Using a ink dauber and Colorbox Frost White Pigment ink to create the white spots, also known as the Bokeh spots. I also sprinkled a few drops of Hedi Swap Gold Color Shine on the background to create some fun!

 photo IMG_20140827_010111.jpg
Proud to say that for this challenge, all the stamps that were used are from Mama Elephant! The shop/house is from the Mama Elephant "Toy Shop" stamp set. The sentiment is also found in that stamp set.

The balloons are are from the "Up and Away" stamp set and i popped it up with foam squares to let it appear to be "flying". Adding white lines to create the round reflection.

The girl is the Virgo from "Cosmic Stars". It is the Virgo birthdays now!! I am a Virgo too! ;) i mask of the star on her hand to make it appear that she is holding the balloons instead.

Lastly, to ground her, i stamped the flowers from the "Love from Above" stamp set.

All images are colored using copic markers and the shop/house was the hardest to color! But i am happier now because the card turn out to be just fine! 

Anyway, hope you enjoyed and visit back soon!

Saturday, August 16, 2014

Bubbles Birthday

 photo _MG_8083.jpg
Not alot of people know about the brand Karber Rubber Stamps (not too sure why when they are so cute!) but i got to know them when they were on clearance at Papermarket's sale. So here's a girl blowing bubbles. Have you played with this soap bubbles before? I believe young or old will love blowing this bubbles because somehow it makes you giggle after you the bubbles come out and burst in the air. Best used for weddings too! Hmmm.. maybe i should have it during my wedding?

 photo _MG_8118.jpg
Image colored with color pencils, blended with Mineral Spirits. I also used glossy accents to go over the bubbles to let it have the extra shine and watery look. Sentiment from Amy R collection, embossed with gold embossing powder. The blue circle background was created by spreading Textured paste over the Tim Holtz circle stencil and then sprayed with Dylusions London Blue on a piece of watercolor paper.

I wish will incorporate more mixed media art in my cards in future because i feel my mix media stash turning into a white elephant.

Friday, August 15, 2014

Sweet Birthday Wishes

 photo _MG_8079.jpg
A couple of posts ago, i posted a card with this same image and the cat was colored with color pencils and blended with Gamsol Mineral Spirit. But for today's card, the image is colored with copic markers! Can you tell the difference?

I will always stamp the same image 2 to 3 times before working on it because i am afraid i will color them wrongly or I can make use of the chance to create 2 cards at one go to save time! And in this case,  I whooped out 2 cards at one go and posted them separately so you won't get bored.

To me, copics have a more "solid" color and the shadows and highlights are more obvious. For color pencils, they always appear more subtle and faint.

Wednesday, July 30, 2014

Carnival Box Card

 photo _MG_8091.jpg
Today's feature is on a box card!

What's a box card?
A box card is a card shaped into a box that opens up to look like the above! And closes up flat to be fitted inside an envelope! So fret'not if you plan to mail this out!

 photo _MG_8108.jpg
This box card closes to be the standard size of 4.25" by 5.5" normal card size.

I used Lawn Fawn's "Admit One" Stamp set on all the images. Colored them with Copic Markers and added Ranger's "Starry Night" Stickles on the carrousel. I am a bigger fan of cotton candies then ice cream, so i cut off the cones of the ice cream and added wooded stick to the back. I am not sure about you, but i think it does look like a pink and blue candy floss! Yums!

I also used Paper Smooches "Balloons" die to cut a few colored cardstocks. Mount them with foam tape and paste them at the background. What's a carnival without some balloons, yea?

Here are some images taken from the side. It was hard to take photos because there were too much depth and my i am using a 1.8mm lens. The camera went crazy when choosing what to focus on.

 photo _MG_8093.jpg
The best thing is, i used the cut apart journaling sheets from Echo Park to paste the side panels. I just had to slightly trim down the 4"x3" journaling cards and images fit perfectly to the side panels.

 photo _MG_8094.jpg

Sunday, April 27, 2014

Shaker Pandas

 photo _MG_7116.jpg
Addicted to the cute pandas from Mama Elephant's "Pandamonium" stamp set! They are so adorable and i had to put them into a shaker card.

First, i stamp them (pandas and envelope iamge) on some Shrink Plastic with Stazon Ink. Then i cut them out, followed by heating the plastic over my heat gun. The plastic shrank and became tiny solid pieces immediately! So fun!

Next, i die-cut a circle on a piece of pattern paper to lay a piece of transparency over the window. Threw in the pandas and envelopes along with some sequins into the circle and sealed the sides with tons of foam tape. If i were to do this again, i would cut a square instead because it is not easy to seal the sides of a circle!

Anyway, i used Simon Says Stamp's "Happy" word die-cut to run through 5 sheets of paper. I stick them on top of each other to create a dimensional effect. Learnt this from Jennifer McGuire! Genius way to pop it up instead of cutting small strips of foam tape!

Here's a closer look at the card!
 photo _MG_7116.jpg

Saturday, February 22, 2014

The Hiding Dog

 photo 1794655_639791676076028_1074231430_n.jpg
I haven't heard of Wild Rose Studio stamp set until recently when Maple Treehouse had a sale this brand. Oh my my....... They are so cute and good to color with! Strongly encourage you to get them to practice your coloring because you can start off by picking colors up from the packaging image. The packaging image tells you where to look out for the shadows and highlights!

So stamped the image twice. Once on the oval white cardstock and another time on a scrap piece of white cardstock. I used copic markers and colored the dog on the oval cardstock and colored the presents on the scrap piece of cardstock. Cut out the presents and popped it up on top of the uncolored presents on the oval cardstock. Of course, you can color the presents on the oval cardstock too. But i am lazy and i wanted to save time. Lastly, presents are more exciting with stickles applied onto it!

Sentiment by Hero Arts "Many Birthday Sentiments"

Saturday, July 6, 2013

All About Cats

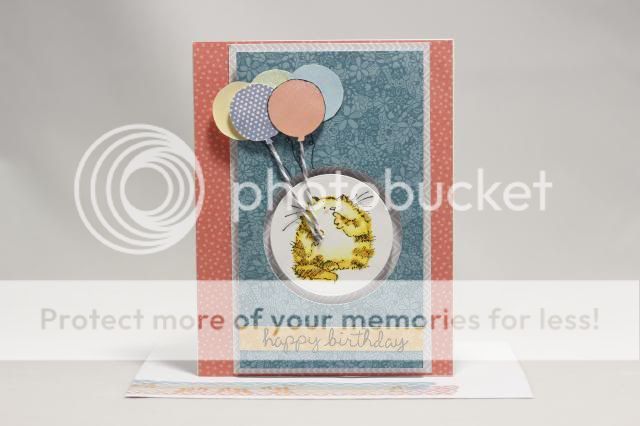
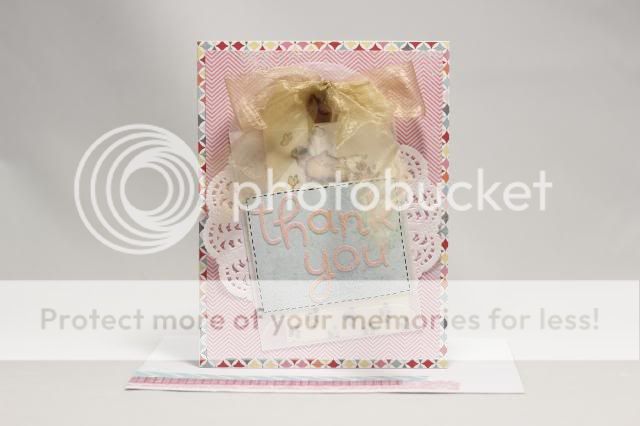
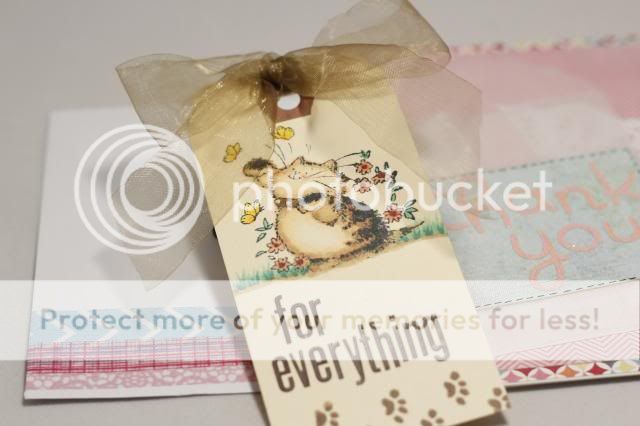
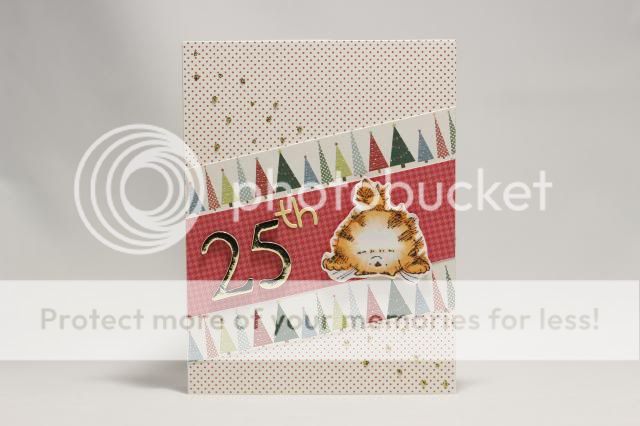
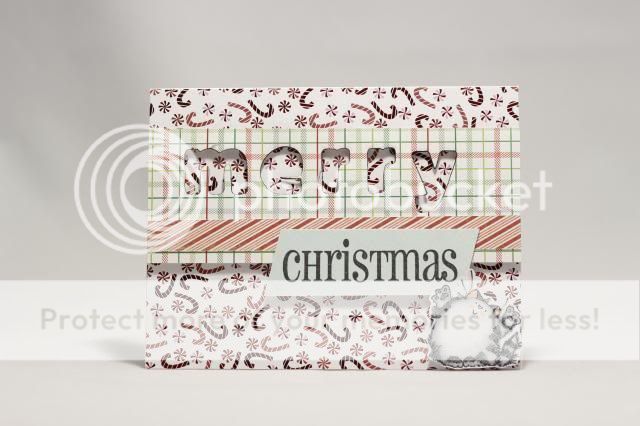
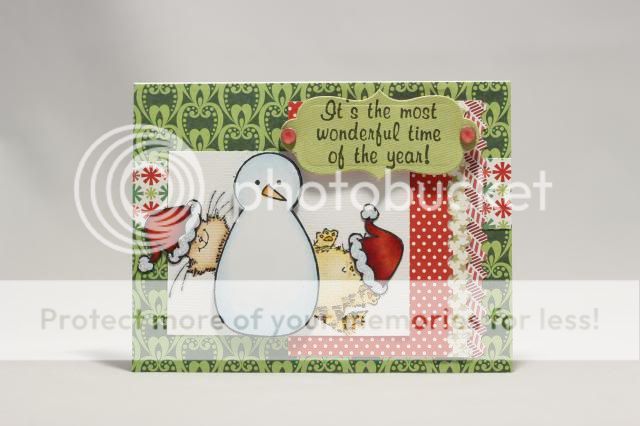
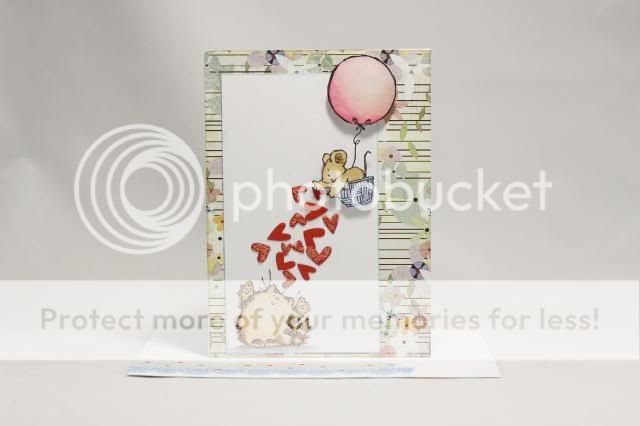
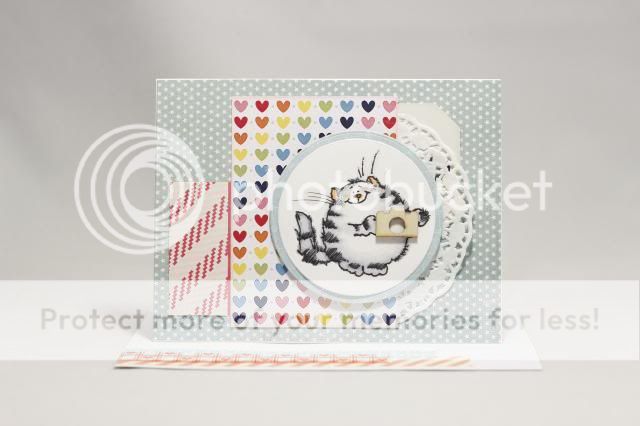
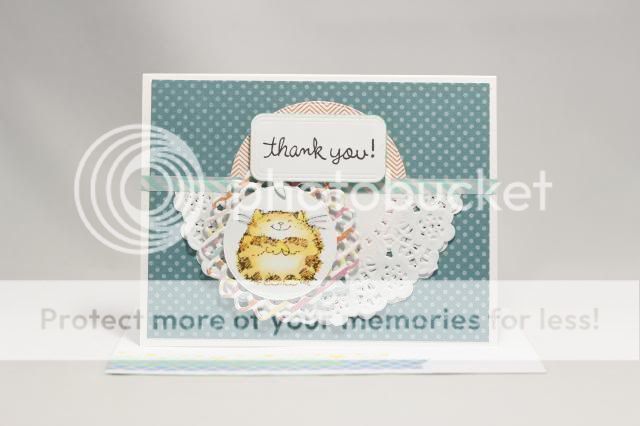
You have seen how the process goes! So here's the end products of the Cat cards I am suppose to make. 20 cards in total, 5 cards for each theme. Theme: Birthday, Thank you, Christmas and non-sentiment cards.

Wanted to keep the cats looking the same throughout the 20 cats, so i picked Penny Black's cat to work on it. Saved my time too, cause i can stamp a bunch and color all the way while working out the layouts in my mind.

 photo _MG_6029.jpg

 photo _MG_6028.jpg

 photo _MG_6027.jpg

 photo _MG_6026.jpg

 photo _MG_6025.jpg

 photo _MG_6024.jpg
There is a pull out tag behind the glassine bag. The sender can include a picture behind the tag!

 photo _MG_6036.jpg

 photo _MG_6023.jpg

 photo _MG_6020.jpg

 photo _MG_6019.jpg

 photo _MG_6017.jpg

 photo _MG_6009.jpg

 photo _MG_6008.jpg

 photo _MG_6006.jpg

 photo _MG_6005.jpg

 photo _MG_6004.jpg

 photo _MG_6016.jpg

 photo _MG_6015.jpg

 photo _MG_6014.jpg

 photo _MG_6013.jpg

 photo _MG_6010.jpg

 photo _MG_6030.jpg
Stamp a few paw prints inside the card to finish off the card.

Hope you got inspired to color some cats!