Showing posts with label Challenge. Show all posts

Wednesday, August 27, 2014

Happy Birthday Virgos!

Hi everyone! It has been a productive week in my craft room! So much so that i had extra time to make a card for a challenge! Yes, as per the picture above, it's the Mama Elephant And Me August Challenge and i will be using the following card to enter it!

Since i was already in a watercoloring spirit when i made a card i posted a few days ago, i took the chance to make an additional watercolor background for the challenge card. And like i had mentioned earlier, i learnt my technique from a youtube video called "Bokeh Made Easy by Wplus9 Design". Instead of using watercolor palette, i used my Derwent Inktense Pencils which can be used for watercoloring too! So i used Teal Green, Apple Green and Sun Yellow for my background! I diecut a few circles onto a acetate sheet to create a DIY stencil for my Bokeh effect. Using a ink dauber and Colorbox Frost White Pigment ink to create the white spots, also known as the Bokeh spots. I also sprinkled a few drops of Hedi Swap Gold Color Shine on the background to create some fun!

 photo IMG_20140827_010111.jpg
Proud to say that for this challenge, all the stamps that were used are from Mama Elephant! The shop/house is from the Mama Elephant "Toy Shop" stamp set. The sentiment is also found in that stamp set.

The balloons are are from the "Up and Away" stamp set and i popped it up with foam squares to let it appear to be "flying". Adding white lines to create the round reflection.

The girl is the Virgo from "Cosmic Stars". It is the Virgo birthdays now!! I am a Virgo too! ;) i mask of the star on her hand to make it appear that she is holding the balloons instead.

Lastly, to ground her, i stamped the flowers from the "Love from Above" stamp set.

All images are colored using copic markers and the shop/house was the hardest to color! But i am happier now because the card turn out to be just fine! 

Anyway, hope you enjoyed and visit back soon!
Sunday, August 3, 2014

Happy Halloween with Gerda Steiner Designs

Hello everyone! Hope your weekend has been great so far as I was busy fulfilling card orders and making a craft haul purchase!

Firstly, i have an announcement to make - I MADE IT TO THE GERDA STEINER DESIGN TEAM! My first official stamp company DT. Gerda Steiner designs and illustrates her own Digital Stamps and i found her on Instagram a few weeks ago when there was a cute image of a dog on scooter. Then i fell in love with her Diving Hippo, which i am so glad that she decided to use the hippo as the DT badge! Now i can look at it everyday on my blog! Hahaha.. And in case you are wondering, you can purchase the Diving Hippo Digital Stamp in her shop (Click on the Badge for the link). I love to see her sketches posted on her instagram as it is so behind-the-scene! Follow her and send her some love! Instagram: Gerda Steiner Designs

 photo IMG_20140803_144800.jpg

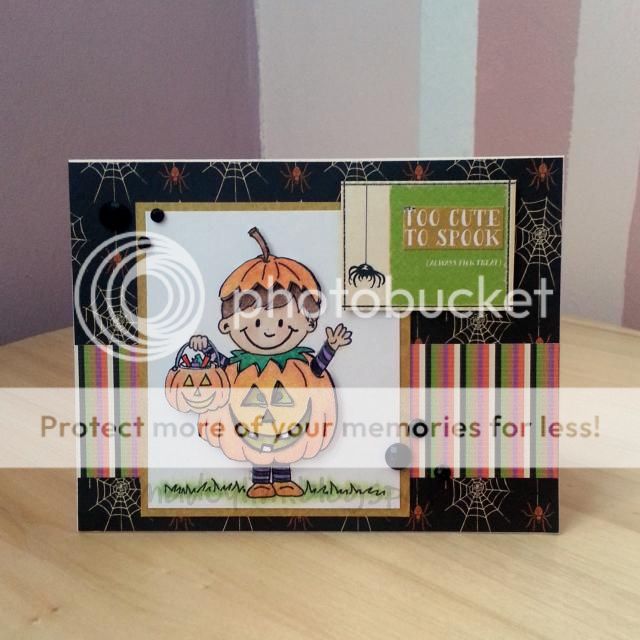
Here's a card i made for GSD August Progressive Challenge: Halloween Themed.

In Asian countries, we don't celebrate Halloween as much as the states. To me, the Seventh Month Ghost Festival gets more attention than Halloween Party. Anyway, the digital stamp to download this month is the Kid in Pumpkin Costume.

Check out the Challenge Blog to participate and stand a chance to win more digital stamps.

For this card, i used Prismacolor color pencils to color the digital image. Safe colors to stick with are: Purple, Green, Orange and Black - Totally Halloween-ed colors!

 photo 20140802_225327.jpg
I printed an additional image to color the pumpkin only and cut the pumpkin pieces out. Using a penknife, i carefully cut the eyes and mouth out too. Remember to use a black marker to outline the outside so no white edges can be seen. Next, i used 3D foam squares to pop up the pumpkin so it it will look like its glowing inside!

Papers from Graphic 45 and Webster Pages. The sentiment "Too cute to spook" is also from the Webster Pages paper, which i cut out from. This boy in the pumpkin isn't scary at all, right?! So this sentiment fits it perfectly!

Wednesday, May 30, 2012

FML05

Photobucket

Plain and simple card, for him or for her.

When i was doing the rosette, i used a 1.5inch by 6inch paper to score 0.5inch lines and i realized i could only form half a rosette! Didn't realize that the length and width measurements would affect the rossete so i had to trim the 1.5inch down further to 0.75inch in order to make it successful. A lesson well learnt. haha..

Along with the attempt to try doing rosettes, i also made my very first attempt to use washi tapes on my card! I think its pretty decent for this!

Photobucket
Hope you like the cute muffins by Lawn Fawn's Breakfast set because i really love them. So small and cute!


Taking this card to participate in Lawn Fawn's Challenge.

Till then, have a great day ahead!

Monday, May 28, 2012

Last Cupcake

 Photobucket

Uploaded this photo in a hurry and i got the dimensions wrong, so this photo looks much smaller than my usual photos. hehe.. luckily not much details to show.

So this is the 3rd KaiserCraft wood veneer. If you know, the package comes with 3 cupcakes of different design. You will be able to find the entries where i posted the projects with the 1st cupcake and the 2nd cupcake by clicking the respective links.

These 3rd cupcake is puffed with Ranger's white puff embossing powder and glittered with waterfall stickles. Painted the base of the cupcake brown and used a sew easy twine to tie a bow. Papers by Basic Grey's new collection, Shine On. The flat back pearls by M3H and the flower brads are given by my friend. Realized that the wood veneer will look great pop-ed up and the toothpick sticked to the back with the banner hanging out.

Inside of the card is empty, undecorated.


 Submitting this project for Lawn Fawn's challenge #34. Closing date is Wednesday, 30th May.

Monday, May 21, 2012

Favourite CNY Goodies

Photobucket
I've printed these photos a few weeks and have been holding off because i was working on other bigger projects (which i will share with you in the next few entries!). Can you imagine the struggle i had because i knew what i wanted to journal and what title it would be and how simple it is going to be as well!

So all i had to do was to find a sketch to kick start this layout. But i happen to find 2 challenges under my radar having a similar sketch feel. So based on Frosted Designs Sketch Along Tuesday Sketch #41 and Scrapbook Circle May Sketch Challenge, i begun my advanture!


Photobucket

Just in case you don't know... Other than visitings, small gamblings and reunion dinners, the snacks on the guest's living room table is not to be missed. I ate the above 3 items almost everyday and item no.2 is not easy to buy. Somehow, i can't find alot of people selling the honey coated cornflakes only. It always came with biscuits under it, which i don't like! So one day as i was roaming around facebook, i found my friend taking a photo of the honey coated cornflakes because she had just baked it! I thick-skinnedly requested to have it during our reunion dinner and she brought a container full of it! However, everyone at the reunion dinner didn't really like the sweetness of it so........ i thick-skinnedly took the whole container home to eat!!! *Evil*

Photobucket

Photobucket

Monday, May 7, 2012

FML04

Photobucket
Hi! I'm back again and for the first time, i'm using a chevron paper! The rave of this zig-zag pattern is huge in the scrapbooking world now and i have to say, i'm part of it. I even bought a washi tape with zig-zag pattern during MWL 50% sales! To be honest, washi tapes are too ex unless they are on sale. =(

I initially wanted to distress the sides of the tag with stormy sky distress ink. But i ended up having lines because i sponged it too quickly. So i instead of throwing away the tag, i pretty much soaked the tag into the ink pad and got it so wet until it curled up! But thank god for heavy books, i manage to straighten it out and thank god the tag did not end up too weak and soft.

Photobucket

Photobucket
Simple finishing inside.

Sunday, May 6, 2012

HB05

Photobucket
Like i previously mentioned, Simon Says Stamp is celebrating their 3rd birthday and the challenge prizes are so attractive! PLUS, you can enter as many entries as you like! So here i am with another card! Bought this Studio G stamp set the moment i saw it at my LSS because it was too cute and only $1.95! Good deal!

Photobucket
Popped the tag up with foam dots because i simply love seeing the shadow of the flowers.

Photobucket
The inside of the card to finish the whole card off.

Sorry for the poor lighting because it has been raining lately and i can't get enough sunlight for the card so i had to turn on my lamp. Really wanted to share this card so heck it! Here i am with the poor photos!

Saturday, May 5, 2012

HB04

Photobucket
This looks something similar from HB03 but i added lovely flower rhinestones from M3H to have some dimensions. Everything is watercolored and the balloon is glittered with waterfall stickles and alphabets from Prima. Hope you like it!

Photobucket

Photobucket
Inside of the card!

Will be using this card to play along at Simon Says Stamp. They are celebrating their 3rd birthday and are giving away generous gifts! Do check them out and play along if you are interested!

Till then, enjoy your weekends!

Saturday, April 28, 2012

High Distinction

Photobucket
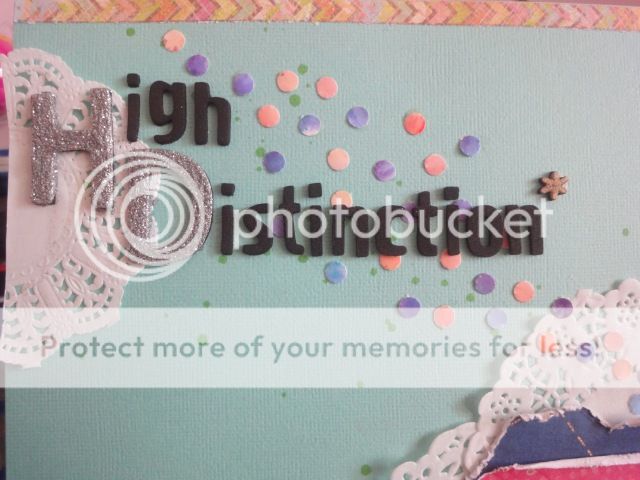
This LO is one of the plainest LO i've ever done. No flowers, no glitters, no stamping. However, i did my usual DIY style of embellishments. Layered dollies at the bottom because this pic was taken during flora's birthday and we bought cupcakes for her. The cupcakes were so nice! I still cant forget the taste, but i've forgotten the shop name. hehe..

Photobucket
I choose the title "High Distinction" because prior to submitting every project, we will say "This is sure a High Distinction!". Which always ends up a Distinction and once a High Distinction. haha! Alphas by AC Thickers. Initially painted the "H" and "D" so to silver so it could stand out but it turn out the opposite way so i end up painting mod podge on it and sprinkling silver glitters. Saving my mistake! Punched tiny circles of alcohol inked papers to form a diagonal line of visual to the picture.


Photobucket
Made this stick pin using lace trim, feathers and butterfly punch from MS.

Photobucket
I've got to thank my awesome group mates in my uni days because it was the project group with so much fun even when we had so much last minute work to do! I remember we once completed a project within 1 week! 5000 word report~~ haha.. that was awesome!

Photobucket
Journaling for the LO.

Using this LO to play along in Frosted Designs and Bird is the Word.

Sunday, January 8, 2012

Sketch Along Tuesday #31

Photobucket
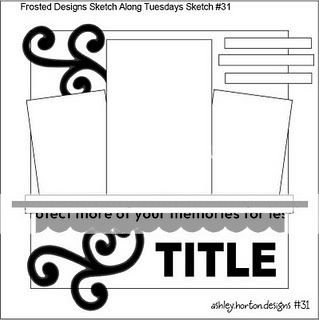
My take on Sketch Along Tuesday Sketch #31 hosted by Frosted design. Love the Bo Bunny "Island mist" paper because the blue is so calm and cooling.

Photobucket
This is the sketch provided.

Photobucket
Hello Kitty Polariods taken with Yingxuan and Jiaxin when we randomly decided to meet up for dinner. It is the first time that just 3 of us meet for dinner  even though we have known each other for so long.

Photobucket
Titled "So Cute!" because i told them i didn't like Hello Kitty but whenever the polariod came out and i screamed "So Cute!" it meant that every other doodle on the polariod was cute EXCEPT hello kitty. haha.. So they claim i am bias towards hello kitty. LOL. "So Cute" alphas are by AC Thickers and the others are by Prima's Tiny Alphas.

Photobucket
Instead of our usual favourite restaurant "Sushi Tei", I suggested to go for 2Day1Night Soju Bang korean BBQ buffet. Still love the place even though they had raised the price slightly. There are more spaces now too. The paper used is Basic Grey "Kioshi" paper pad and i bought a dater stamper so i could easily stamp the dates of the outings when i scrap.

Photobucket
I went into my LSS the last time and saw a bag of transparent buttons by "bag-O-buttons" and i immediately grabbed it because i like the idea that i can ink it to whatever color i want. So this time round, i inked it with Ranger's "Sail Boat Blue" and "Pearl" alcohol inks. Then threaded it to complete the look.

Photobucket
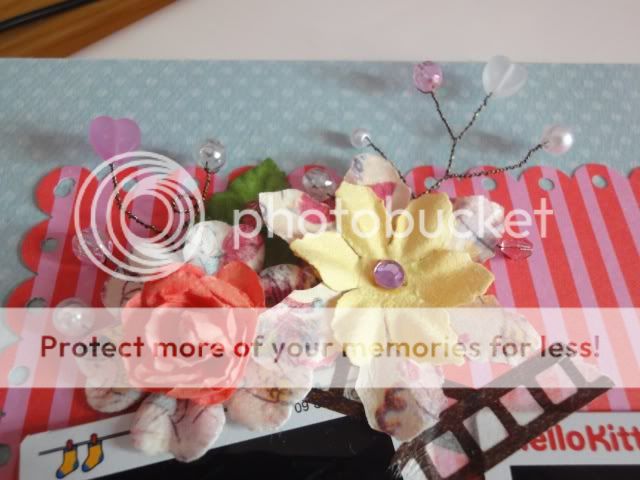
Inspired by a youtube user "LuvLeeScrappin", i made my own flower or should i say bead spray. She made a video on the technique and her projects are freaking fabulous. You can also check out her blog. Flowers are by Prima.

Photobucket
I also punched out a MS Monarch Butterfly and added a few beads in the middle to make the butterfly more "alive". Haha... the antennas are abit messy because i can't get a hang of it twisting it in rounds/swirls/spiral, whatever u call it~~ Will keep trying!

For this LO, i also used Washi Tapes which i really seldom use them because i am always too lazy to take them out. I also bought 2 AC Border Punch to try when they were released at my LSS. I've got to say, it is really more convenient than other punches. If you don't know what i mean, i'll share in my next entry! ;)

Monday, December 19, 2011

Xmas Shadow Box Card

Photobucket
I walked into Kinokuniya the other day and found myself standing infront of the crafting magazines. I didn't know which magazine to purchase so for the first time i purchased "Crafts Beautiful" magazine from UK. After reading, i still prefer learning my techniques via Youtube but magazines are a better companion on public transport. Anyway, i flipped open and i am glad i found a useful technique called "Shadow Box Card" and i insistently wanted to attempt the idea. And here i am with my first shadow box card! I really love it. Can't bear to give it away this xmas though! haha..

Anyway, i used this card to participate in the Maple Treehouse Xmas Challenge because the prizes are too delicious for me to miss out! So be nice and vote for my work, can? Would really appreciate it! More prizes won means i will make more layouts without spending so much! ;)

Photobucket
M3H sells very pretty colors flat pearls and i decided to use some of the pearls for my pretty tree. Plus i specially bought their star blings for my all my xmas tree cards! Bf says "This tree is tall because it can touch the star."

Photobucket
Origami Santa!

Photobucket
Embossed and popped the ornaments up to create the lights effect. Clear Embossed snowflakes and background distressed with Stormy Sky Distress Ink.

Photobucket
Simple ribbon plus MS Dolly Lace Punch

Photobucket
With a pretty outside, of course must have pretty inside lar!

Photobucket
Stamped lots of snowflakes around the corner to match the background of the shadow box.

Hope you guys have sent out your xmas cards and are planning the parties ahead!


Supplies Used: 
- American Craft White Cardstock, Me & My Big Ideas "Mambi Sheets Pad", Bo Bunny "Noel Mini Edgy Album Paper Pad"
- Unity Stamps "Itty Bitty Ornament Season", Lawn Fawn "Harold's ABCs", Lawn Fawn "Making Frosty Friends" Stamp
- "Stormy Sky", "Shabby Shutters", "Forest Moss", "Vintage Photo" distress ink, VersaMagic "Night Sky", VersaMark
- Ranger Super Fine "Clear", Zing "Black" Embossing Powders, Perfect Pearls "Perfect Pearls"
- Martha Stewart "Dolly Lace" border punch
- MapleTreeHouse "Cherry Top" and "Emperor's Gold" Pearl embellishments and "Twinkle Star Crystal" Rhinestones
- Ranger "Eucalyptus" Stickers
- Normal Green Polyester Ribbon, "White" Pen, Watercolor Pencils

Thursday, December 1, 2011

MWL Scrap This and That : #1

 Okay, i am going to confess that i am a lazy 12x12 LO scrapper because i only scrap 12x12 when there is a challenge. Reason being, i am too lazy to crack my brain to think of a sketch and following a challenge sketch challenges me to go further. So, i followed this sketch to participate in the Made With Love Scrap This and That Challenge. I really like this sketch because we could use ANY manufacturer but had to make sure we had a heart shape accent in any form in the LO. To me, that's simple!  

Photobucket
So here's my take! Picture taken during RMIT Annual Bash themed "Summer Daze". Very appreciative that bf was there to see the show and did not complaint that he was alone all night because all councillors were so busy with the program and i was busy hosting the sponsors at the VIP area. 

Photobucket
The heart shaped accent is formed by stitching the middle of a ribbon that i had leftover. After stitching, i pull it tightly together forming a grungy trim. Afterwhich, i slowly glue it down in a heart shape form. 

 Photobucket
I used Crafters Workshop's flower template and misted it with bubblegum metallic Maya Mist to decorate the dotted background. Really love this mist color! The rest of the papers are from Me & My Big Ideas 8x8" Scrapbook Kit that i bought a few years ago but failed to use it until now. I'm glad that i used abit of my leftover or dusty stash i had to create this LO. *Claps*

Sunday, November 13, 2011

Nov Sketch Challenge

Photobucket
Here's my take on Scrap with V's nov sketch challenge!

I love sketches with many photos options! Cause whenever there is a camwhore, all photos are pretty and i end up printing out all the pretty photos! haha..

Photobucket
Decided to use photos from my first date with B. This first date has always been very memorable and we always look back on that day. We always think back and say "What happens if i haven't ask him for a favor?" "What happens if that day he didn't turn up?" etc.. No one exactly knows our story but to sum it up, we were friends that were not close until the day when i looked him up for some help in my school work and that's when we started hanging out.

Photobucket

Photobucket
I love ribbons from Diaso!

Photobucket

Photobucket


Photobucket 

Supplies Used:
- Bo Bunny 12x12 Kiwi Double Dot Cardstock, Bo Bunny Noel Mini Edge Album Paper Pad, 
Pink Paislee Petite Paper Pack, 
- AC Thickers, Prima Tiny Alphabet Stickers, Colorbok XYZ Glitter Rubons
- MS Monarch Butterfly Punch, MS Dolly Lace Punch
- Prima Crystals
- Diaso Ribbons
- Distress Inks